If you are anything like me, you know nothing about irrigation. You know that sprinklers come on and off on a set schedule, but you never had to learn how the system is set up. I recently spent time learning exactly that.
In my house there was a sprinkler system in place when I purchased it, which is a blessing and a curse. It is great that the difficult work of running PVC is done, and cable run to the sprinkler valves. The problem is the work was done decades ago for a yard layout that we no longer have, and don’t want to recreate. My house had valve boxes that were quite literally buried and I had to rediscover them by luck. Old pipes were discovered underground, and existing pipes were not connected to anything that I could find.
Retrofitting Sprinklers to Drip
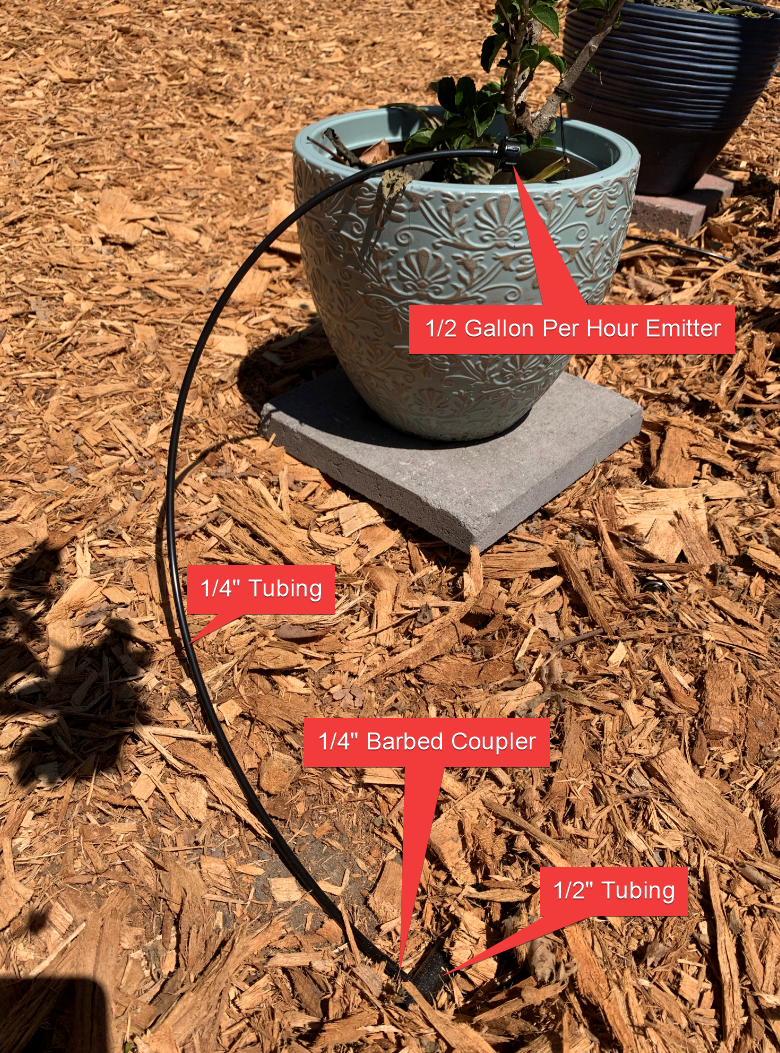
I found a convenient way to change the current sprinklers to drip using a Rainbird Spray to Drip Retrofit Kit. I simply unscrewed the existing sprinkler, screwed this head on, and it was ready to go for drip irrigation. I purchased some 1/2″ poly tubing from Drip Depot to run the main line of water to tap into. From the 1/2″ tubing, you punch 1/4″ holes, and attach 1/4″ barb tubing couplings, then to that you attach 1/4″ poly tubing. At the end of that you attach a barbed drip emitter of your choosing.

I first chose set, cleanable drip emitters, but quickly change to adjustable emitters with a steak attached. With the original emitters I was limited to the chosen flow rate only. If a plant grew and needed more water down the road, it would have to be removed and replaced with a new emitter with more flow. Using the adjustable emitter, you can simply unscrew the emitter a small amount to allow more water to flow. Once the tubing is all set and ready to flow, now to automate the process using a sprinkler control system.
Sprinkler Control System
I am of the digital age and prefer a digital interface to my control systems. When I moved in, we had a sprinkler control system from 2003, an old Hunter Pro-C controller. While it worked perfectly, it was not my preferred method of control. I wanted to be able to schedule and monitor the watering from a digital interface, and this would never provide that.
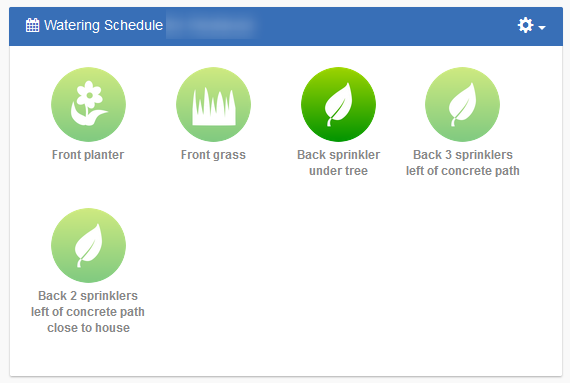
I looked at DIY sprinkler systems with Raspberry Pi setups, but that seemed like to much maintenance and pre-work for my needs. I ended up with a Hunter Pro-C Face-plate replacement that enabled WiFi connectivity and Hydrawise controller support. Once connected, setup and configuration was a breeze compared to the analog model. I was able to re-wire the existing cable and find out which sprinkler zone did what and note it in the Zone Name. This controller software allows you to modify watering schedules and times based on rain and heat forecasts and actual reports.
Everyone talks about Zones in irrigation with the assumption that you understand what a zone is already. A zone in its simplest terms in an area or set of sprinklers that can be turned on independently of other sprinklers. Each valve controls its own zone. The area that is watered by simply turning on that valve is the zone. The most basic zone could be a single sprinkler that is hooked up to its own valve.
Final Thoughts
There is no absolute right or wrong way to irrigate your yard. Different tools work for different situations. Research what others have done, and take the ideas that you like the most.